
How to Connect a VPN on Apple TV
6 min readUpdated
To connect on an Apple TV device, install Happ for tvOS, transfer an active subscription from Happ on your phone and choose a server. The example below uses VPNON, our service. Happ itself does not provide servers.
Sources were read on 25 October 2026. The build number in the retained illustrations has not been established. They do not confirm button locations in the current release. Installation, subscription transfer and connection on Apple TV were not tested in this review.
Connecting on Apple TV
Check the device model, tvOS version and listing for the app you choose. On 25 October 2026, the global Happ — Proxy Utility for TV listing names Flyfrog LLC as the developer and requires tvOS 17.6 or later. This is a separate Apple TV app, not an installation of the iOS version.
Apple describes downloading apps from the App Store on Apple TV HD and Apple TV 4K. Apple TV (3rd generation) has no App Store, so the installation procedure shown here does not apply to it.
Choose Apple TV in the official Happ list. On the device, open the App Store, find Happ — Proxy Utility for TV and check the developer and compatibility. Then install the app.
If the app is unavailable, do not change your region automatically. First check Apple’s requirements concerning your account balance, subscriptions, family group and payment method.
For the region requirements, read the guide to changing App Store region.
| Metric | Result | max | avg | min |
|---|---|---|---|---|
| Ping | —ms | — | — | — |
| Download | —Mbps | — | — | — |
| Upload | —Mbps | — | — | — |
App Setup
First add an active subscription or provider configuration to Happ on iPhone or Android. Check that the servers you need appear on the phone. For local transfer, connect the phone and Apple TV to the same Wi-Fi network.
Prepare your phone: Android / iOS.
- Open Happ on Apple TV. Wait for the import screen with a QR code. According to the Happ documentation, it opens automatically on first launch; if the app is already configured, open the add screen with +. Keep the import screen open until the transfer finishes.
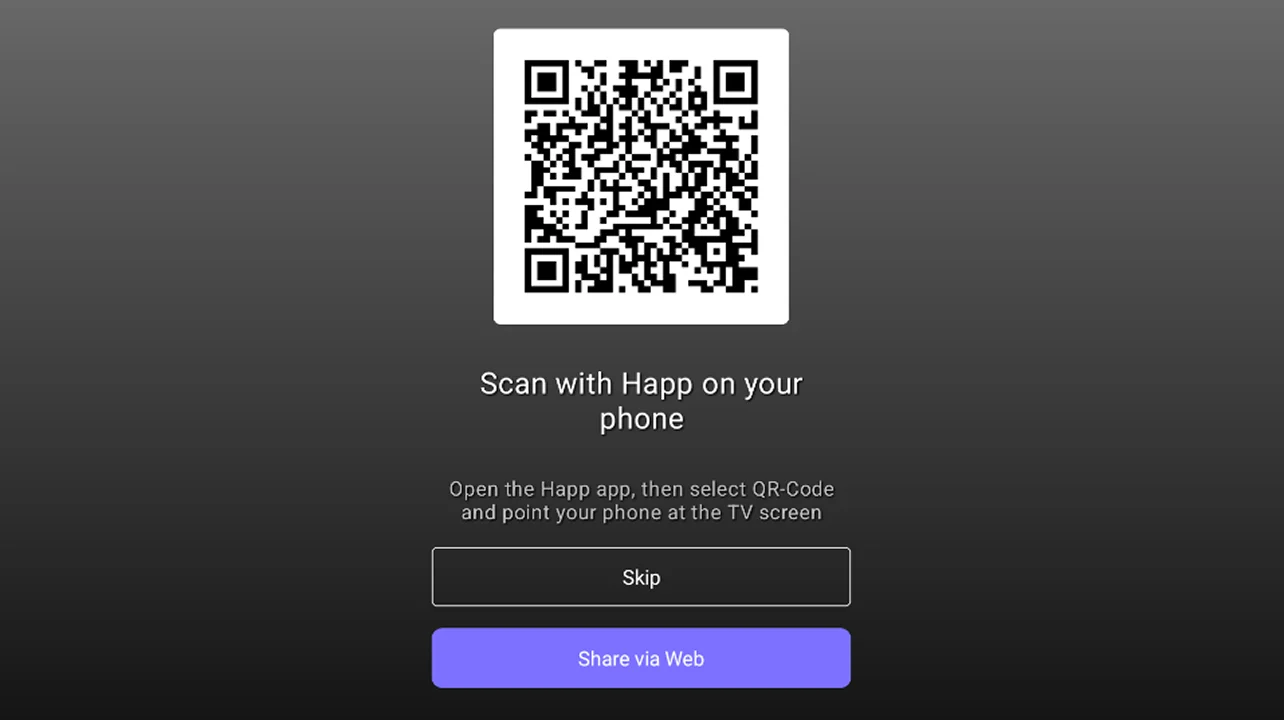
The code in the illustration does not replace the code on your own device.
- Open Happ on your phone.
- In the phone interface shown, collapse the server list using the arrow next to the subscription name to reveal the bottom buttons.
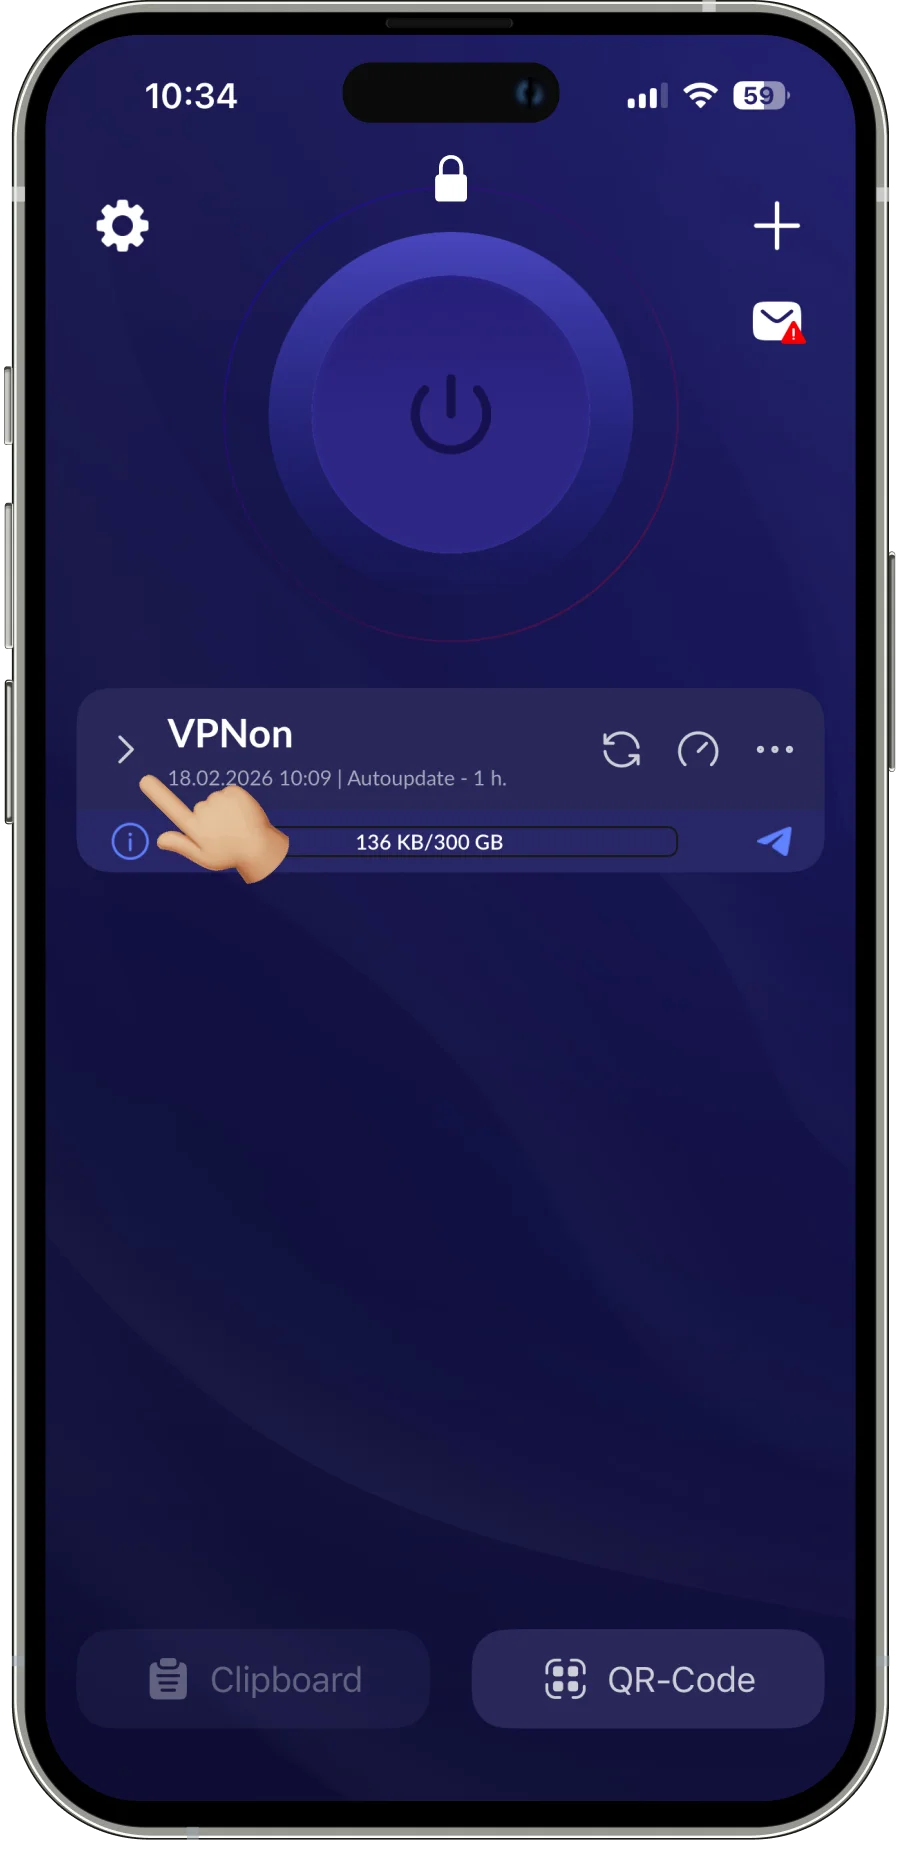
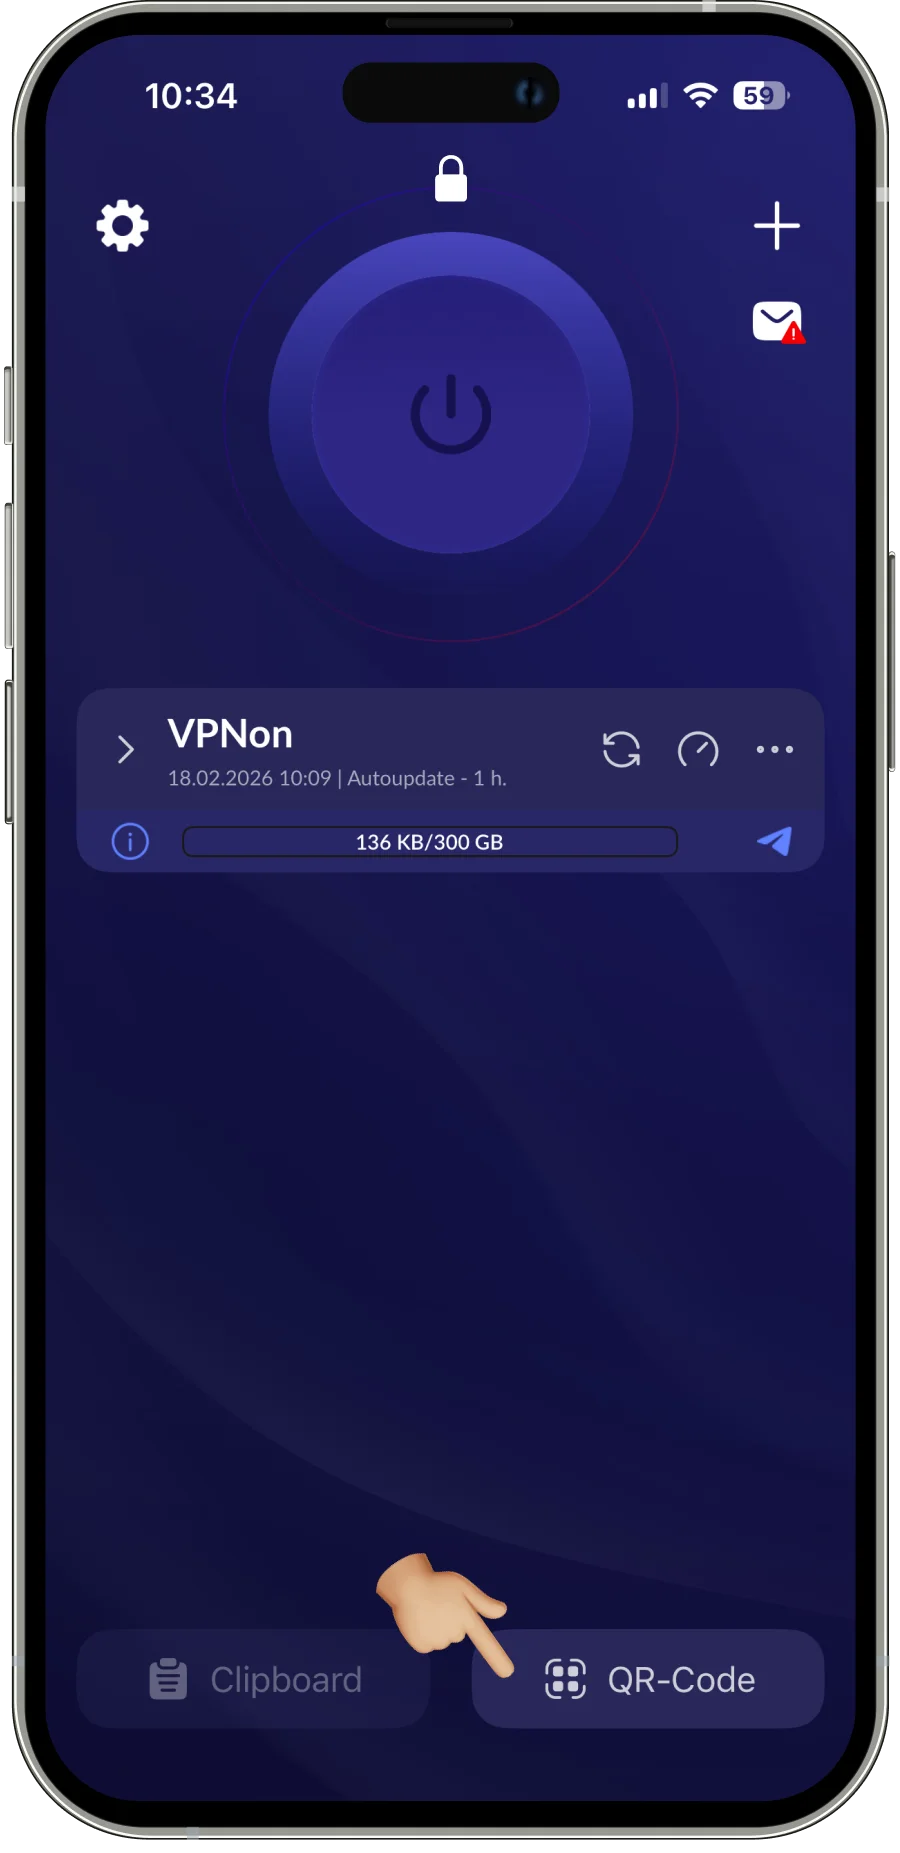
An iPhone is shown; button locations may differ in another build.
- On the phone, tap QR-Code and point the camera at the code on your own Apple TV screen. If your screen differs, find QR scanning in the documentation for your version.
- On the phone, select the subscription or configurations you want to transfer and confirm sending.
If the system requests camera or local network access for Happ, read the request and confirm only the expected action. On iPhone, check the local network permission if the transfer fails. On a managed device, agree on changes with your administrator.
- On Apple TV, wait for the transfer and subscription data loading to finish. Check the resulting list and choose the server provided to you. If the list is empty or an error appears, first check the transfer and confirm that your access is active with your provider.
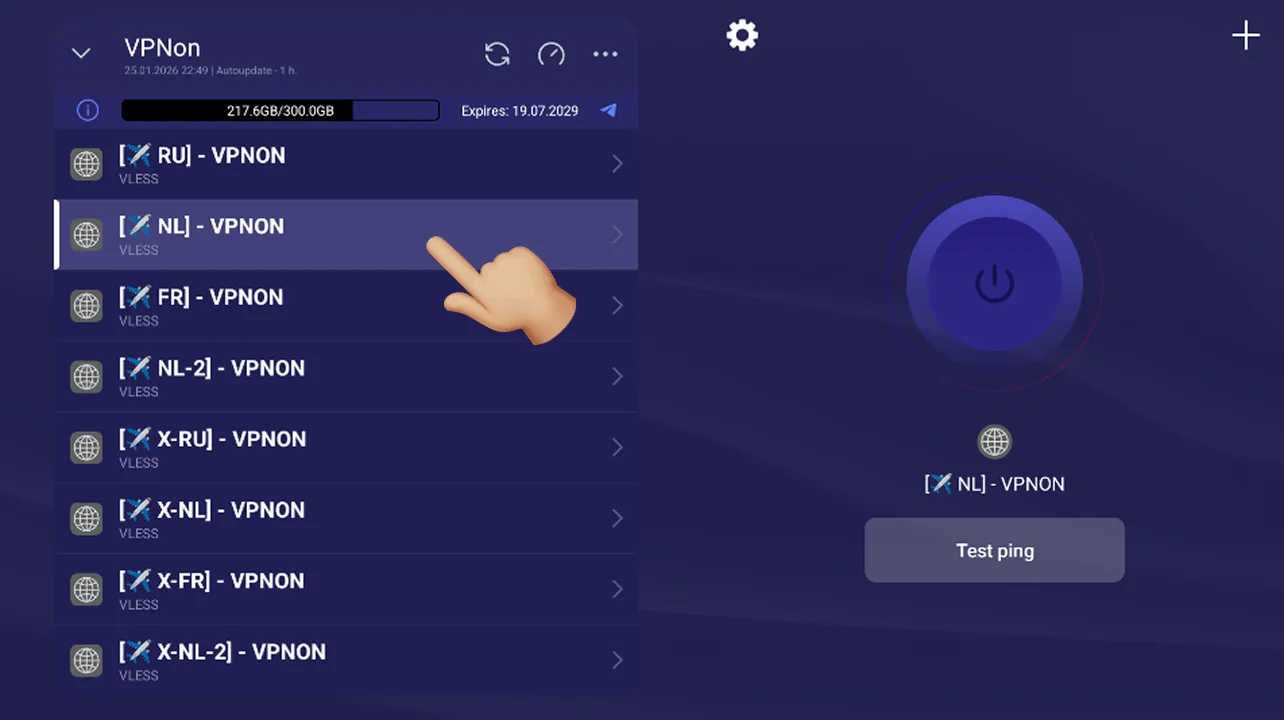
Example list: location, traffic, expiry date and update interval do not set the terms of the current plan.
- On Apple TV, select the large button with the power symbol.
- Wait for the connected state and perform one action you need in an app you are allowed to use. A “connected” status alone does not guarantee access to every service or the same speed. If the action fails, proceed to the troubleshooting checks below.
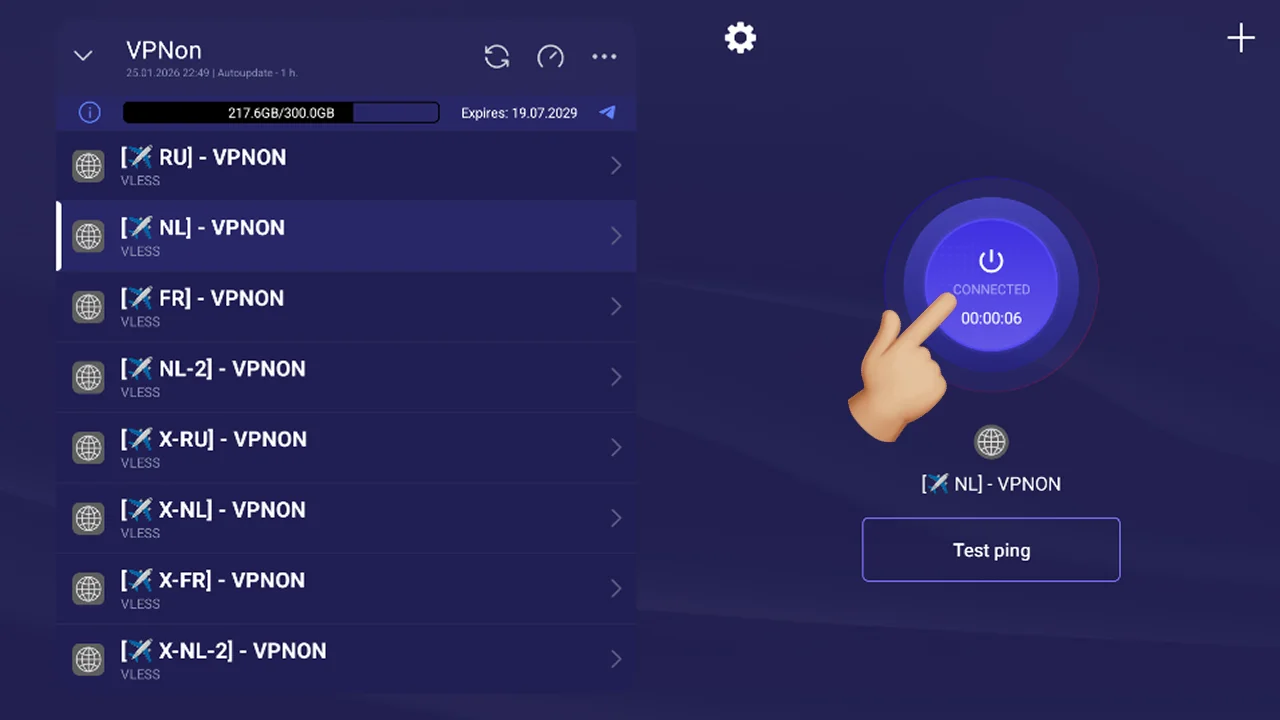
The interface status is shown, not a test of access to every service.
According to the Happ documentation, tvOS settings differ from other platforms: simplified Direct rules replace classic routing. Do not treat desktop client settings as an identical Apple TV menu. Check the action you need on the Apple TV device itself.
If QR Transfer Fails
Web import sends data through the Happ developer’s remote server. Use it if you are willing to send your connection data to that server.
- On the Apple TV import screen, choose web import. In the retained English interface, the button is Share via Web. The documentation calls the feature Web Import.
- In your phone’s browser, open tv.happ.su from the official instructions and enter the temporary code from your own Apple TV.
- Add the subscription or configurations you need and send the data.
- Keep the import screen on Apple TV open until the operation finishes. Then check the server list and continue connecting.
Do not publish the temporary code or subscription link. Do not enter them on a similar-looking third-party site.
If Happ Will Not Install or Connect
- If you cannot find or install the app, check the device model, tvOS version, app listing and availability for your Apple Account.
- If the transfer fails, check that both devices use the same Wi-Fi network, review phone permissions and keep the import screen open. Save the exact error message.
- If servers appear but there is no connection, check ordinary internet access on Apple TV without VPN and confirm that your access is active with the provider. Check the Happ versions and developer documentation. If the error persists, contact the access provider or client developer.
Do not publish your subscription, keys, temporary code or passwords. Do not delete a profile or reset the network for this check. Agree on changes to a managed device with your administrator.
Check installation against Apple’s help, transfer against the Happ documentation and network issues against Apple TV guidance.
Author: VPNON Editorial Team